MQTT
You can access data through MQTT and map it to your program variables. To do so, a new connection of type MQTT must be created.
Create new MQTT connection
Section titled “Create new MQTT connection”logiccloud offers its own integrated MQTT broker through which you can create your connections, or, alternatively, you can also connect your own broker.
logiccloud MQTT broker
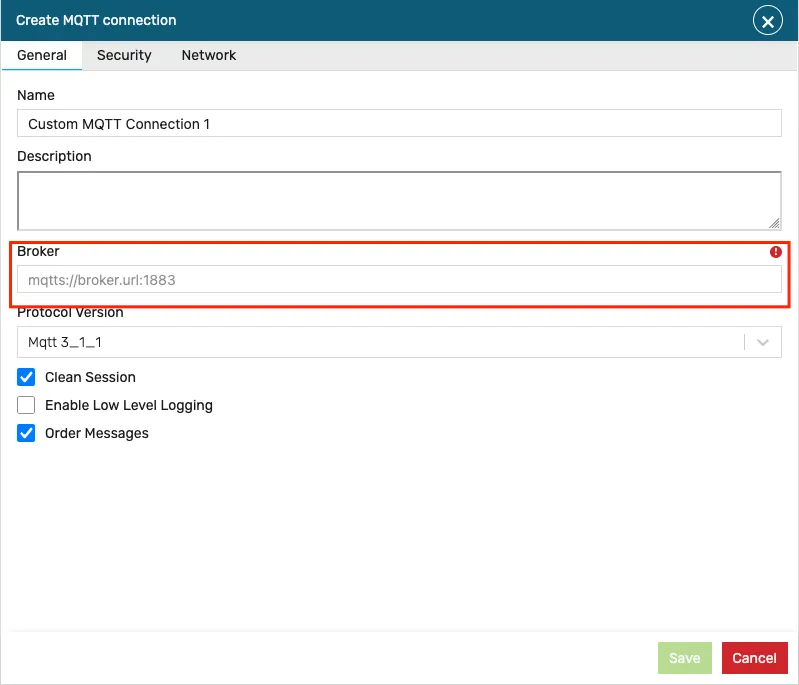
Section titled “logiccloud MQTT broker”To do this, click on the icon for Add logiccloud MQTT connection. You will be presented with a dialog where you can configure the connection:
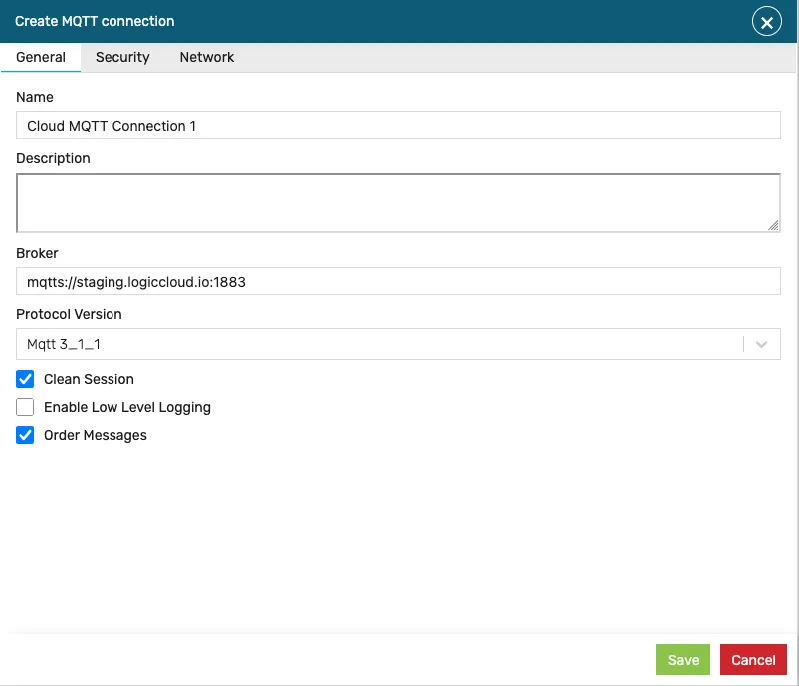
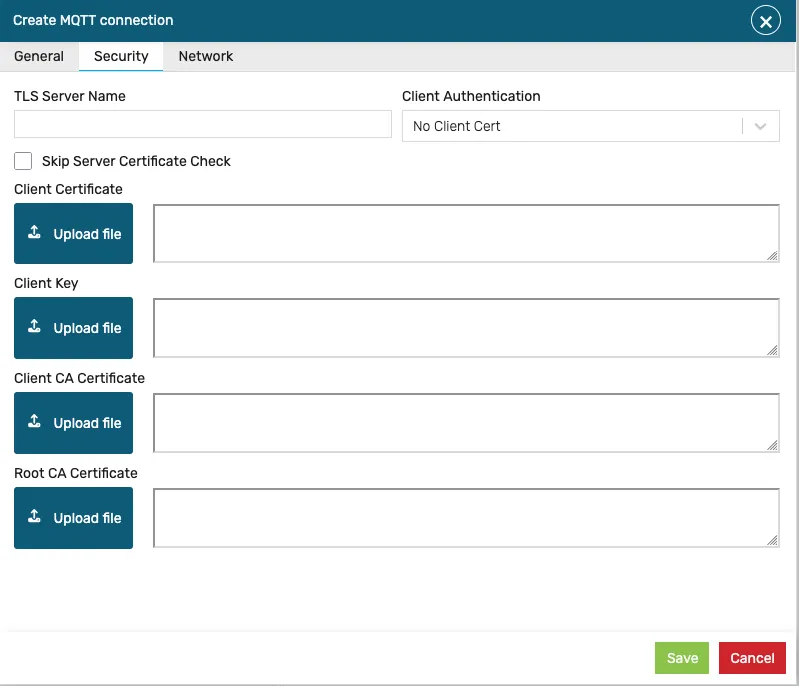
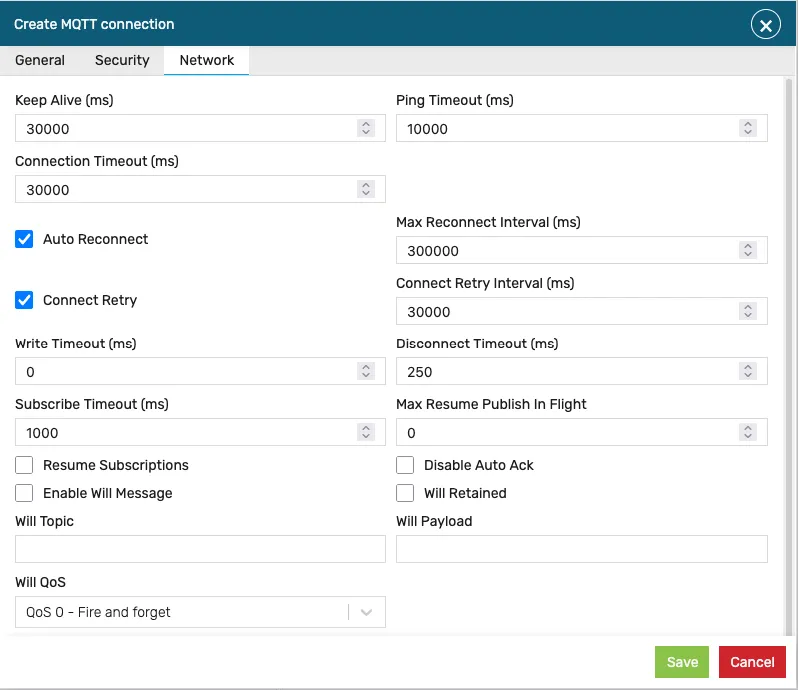
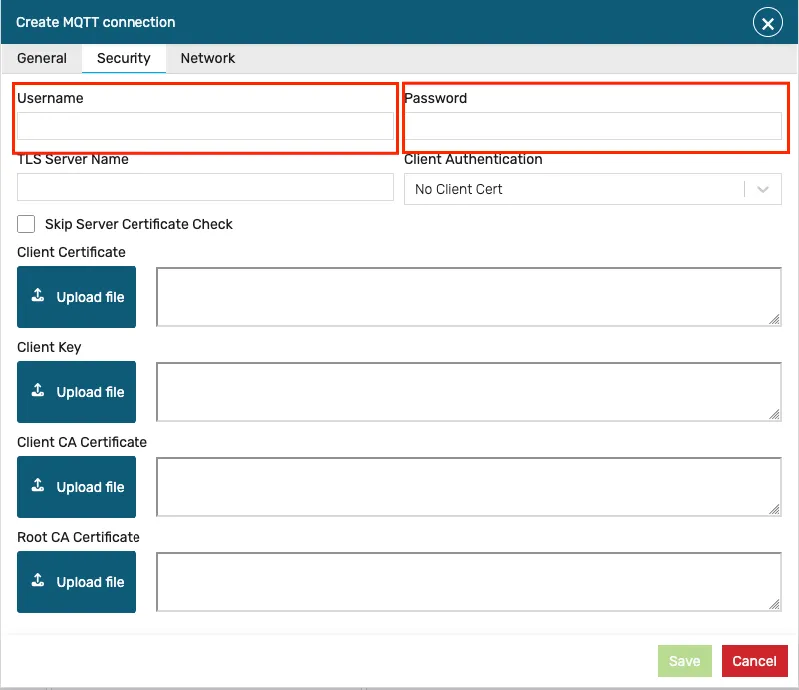
You can change the default name to a more meaningful one, and use the Security and Network tabs to configure advanced properties:
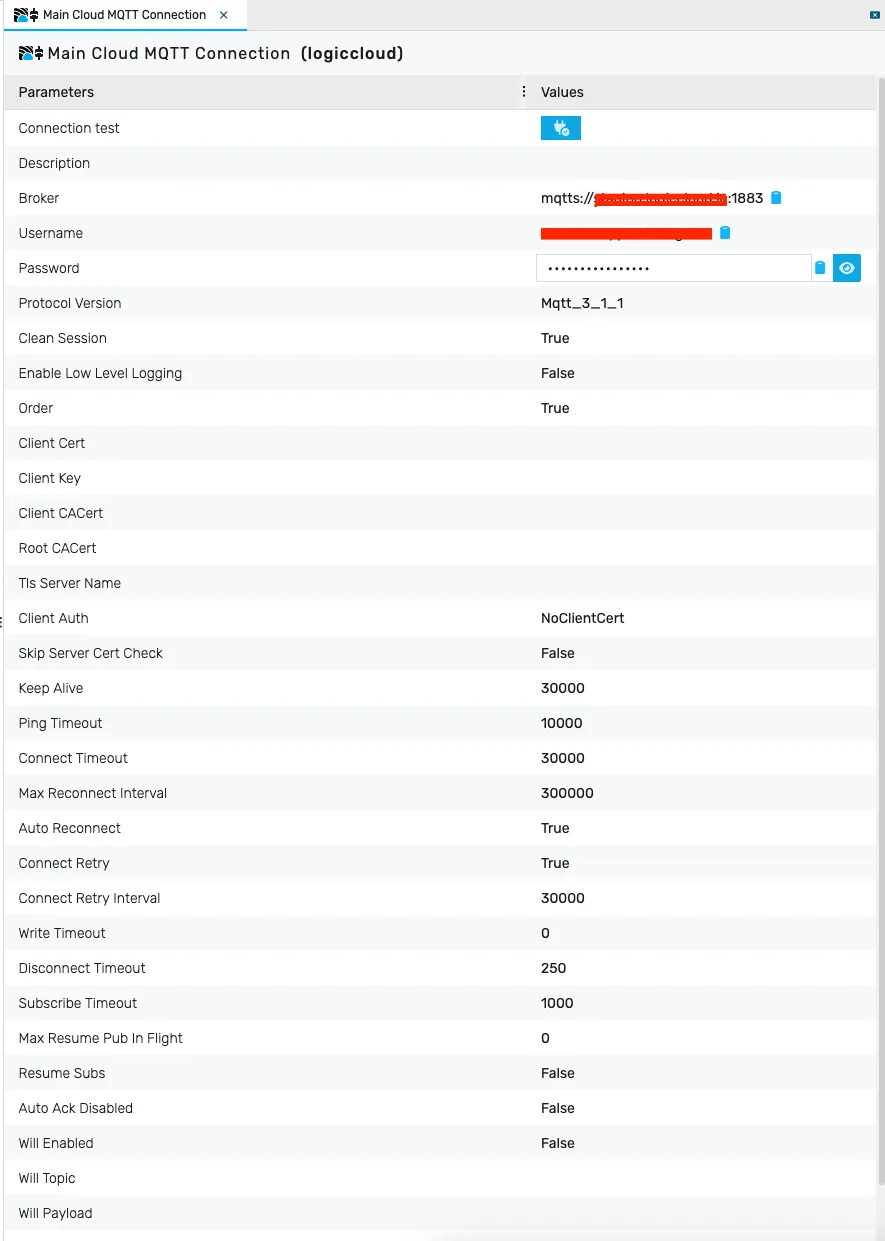
After you have created the connection, select it in the outline tree. The configuration settings are displayed in the connection details:
Own MQTT broker
Section titled “Own MQTT broker”The procedure is the same as when using the logiccloud MQTT broker. Click on the icon Add custom MQTT connection and fill in all the information. The broker address must be specified and, optionally, on the security page you must enter the user name and password.
Sending and receiving data through MQTT
Section titled “Sending and receiving data through MQTT”The MQTT connections can work in two distinct modes:
- Producer - the device will generate MQTT payloads and send them to the broker. In this case I/O variables with the
Outputdirection can be mapped. - Consumer - the device will read MQTT payloads produced by another source from the broker. In this case I/O variables with the
Inputdirection can be mapped.
To create a producer or consumer configuration, right click the new connection in the tree and choose Add producer or Add consumer.
Creating and configuring a producer
Section titled “Creating and configuring a producer”When creating a producer, an initial dialog will be presented, where the producer can be configured (this can be changed afterwards).
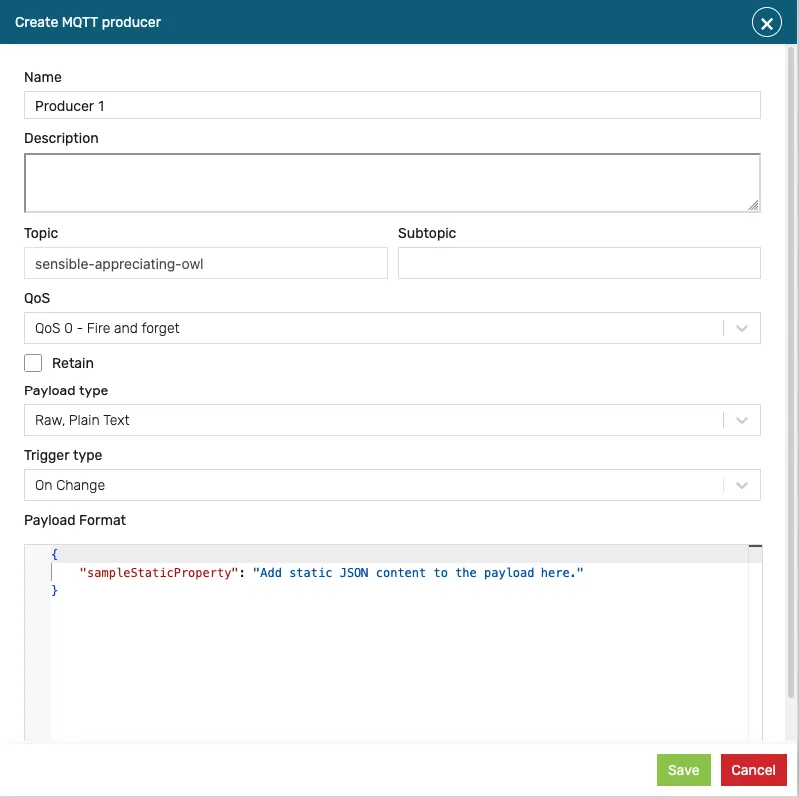
- Name - the producer name (something meaningful)
- Topic - if the connection is a logiccloud connection, the topic is predefined automatically by the system.
- Subtopic - if needed, enter here a MQTT sub-topic path. This will be appended to the
Topic - QoS - MQTT Quality of Service for the published/subscribed payloads. Three levels are supported:
- At most once (QoS 0) - “fire and forget”; no acknowledgment from the receiver (this is the default).
- At least once (QoS 1) - delivery is guaranteed at least once via a
PUBACKacknowledgment (the payload may be delivered more than once). - Exactly once (QoS 2) - delivery is guaranteed exactly once via the four-step
PUBLISH/PUBREC/PUBREL/PUBCOMPhandshake.
- Retain - if set, the broker stores the last message (and its QoS) for the topic and delivers it to new subscribers. Defaults to off.
- Payload type - configure the payload for the producer. See below more details about the payload type.
- Trigger type - configures the trigger behavior that will push data to the broker (see below)
- Payload format - this contains the basic (static) payload format. The final payload will be different depending on the
Payload typeand mapping configuration (see below).
Once set up, click on the save button to create the producer. This will take you to the mapping screen, where further configuration can be done.
Creating and configuring a consumer
Section titled “Creating and configuring a consumer”Similar to the producer, when adding a consumer, a dialog will be presented where the consumer can be configured. Producers and consumers can be configured in the same way, as described below,
with the mention that consumers will read the values from the MQTT broker into I/O variables with the Input direction.
The payload formatting in the consumer must match the broker payload in order for the values to be correctly read.
Mapping data type
Section titled “Mapping data type”Every mapping carries a data type that tells the connector how to encode (producer) or decode (consumer) the variable value. The supported data types are:
| Data type | Meaning |
|---|---|
boolean | Boolean (true/false). |
int8, int16, int32, int64 | Signed integers of the given width. |
uint8, uint16, uint32, uint64 | Unsigned integers of the given width. |
float32, float64 | Single- / double-precision floating point. |
string | UTF-8 text. |
object | A structured (nested) value, encoded/decoded as JSON. |
The object data type is the only one that is payload-type restricted: it carries a
nested JSON structure, so it can only be used when the payload type is one of the
JSON-family modes (JSON Value, JSON Dictionary, JSON object with key). Using
object together with a Raw, Plain text or Raw Binary payload is rejected — see
Data-type / payload-type rule.

Payload type
Section titled “Payload type”The MQTT connection supports multiple payload formats:
JSON Value
Section titled “JSON Value”The mapping values are sent individually, serialized as JSON values (e.g. a numeric value is sent as text: 1.23 and a string value is sent quoted: "my string value")
JSON Dictionary
Section titled “JSON Dictionary”Values are sent individually or grouped (depending on the Trigger type) as a JSON dictionary object:
{ "value1": 1.23, "value2": "text value"}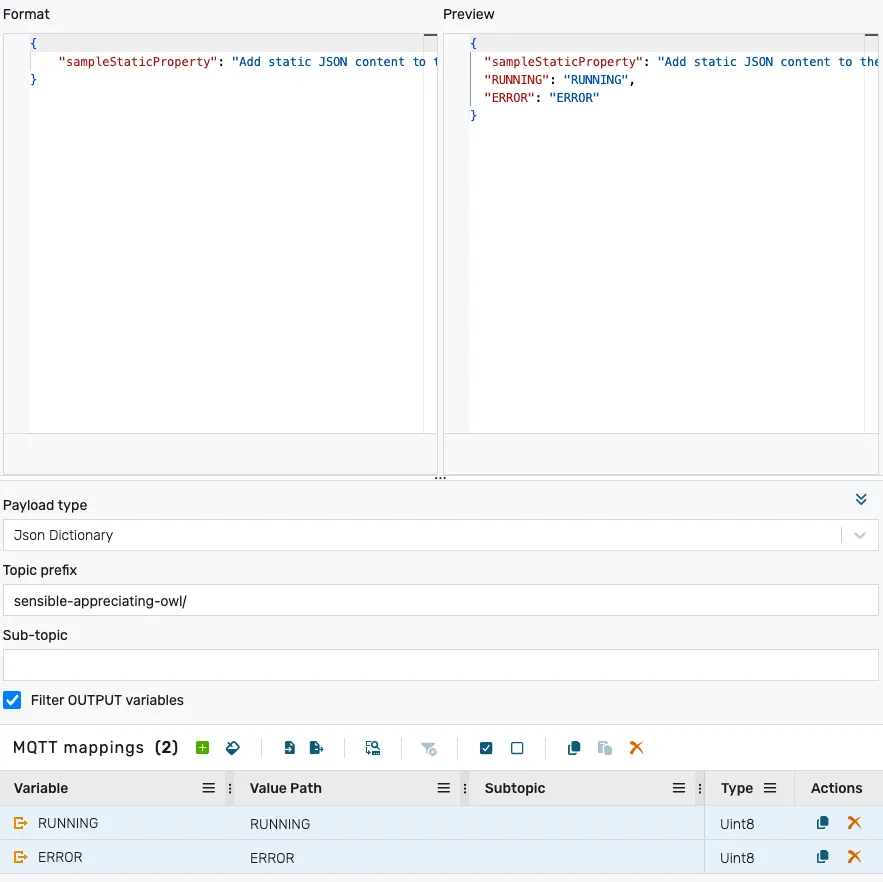
In this screen, there are multiple sections that need to be configured:
- The
Formatsection allows setting up the static part of the MQTT payload. Typically, this will be
{}but it is possible to provide static values in the JSON which will be combined with the mapping values (such as the sampleStaticProperty created by default).
-
The
Previewsection shows a preview of the final payload. This is automatically updated whenever theFormator theMappingsare adjusted. -
The
Payload typedrop-down allows you to change the payload type (note that you might need to redo the mappings). -
The
Topic prefixis displayed when using a logiccloud MQTT connection. This cannot be changed, it is informational only. -
The
Sub-topicallows editing the sub topic. This will be appended to theTopic prefixautomatically. -
The
MQTT mappingssection allows you to map the variables to the MQTT payload.
For a quick mapping, use the fill button:

Optionally, mappings can be added one by one using the add button:

The mappings table shows the following information (which can be edited):
Variable- the program variable that will be mappedValue path- the JSON path corresponding to the variable. Changing this will be reflected in the preview section. This property allows mapping values to JSON entries with different names than the variable.Subtopic- if set, the values will be sent on the specified sub-topic. See Subtopic validation rules for the constraints applied to this field.
JSON object with key
Section titled “JSON object with key”This is a more advanced payload format, allowing structuring the output in multiple ways:
Most of the properties are similar to the JSON dictionary options, with the exception of the Mappings table.
The mapping properties are described below:
Variable- the program variable that will be mappedPath- the JSON path inside the payload. This can be an object name (e.g.temperature) or an array entry.Value path- the JSON path where the value will be placed (under thePath)Key path- the JSON path where the entry key will be placed (under thePath)Key name- the key for the specific valueSubtopic- if set, the values will be sent on the specified sub-topic. See Subtopic validation rules for the constraints applied to this field.
To illustrate these here are some examples:
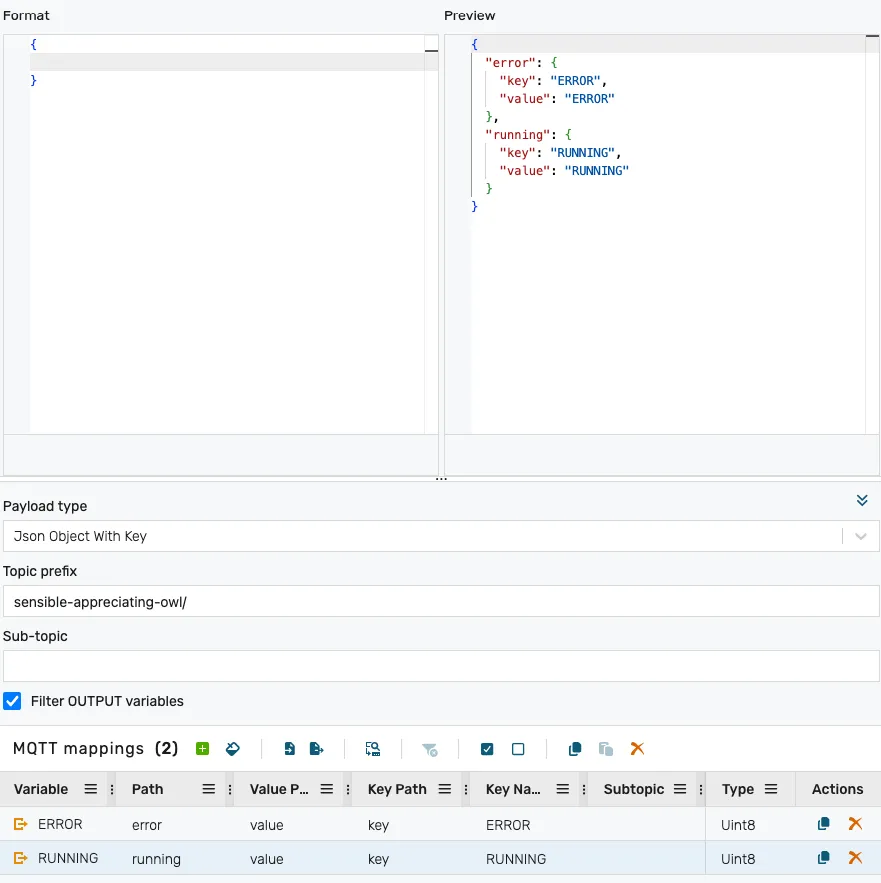
** Example 1 - entries are provided as sub-objects with two properties: key and value**
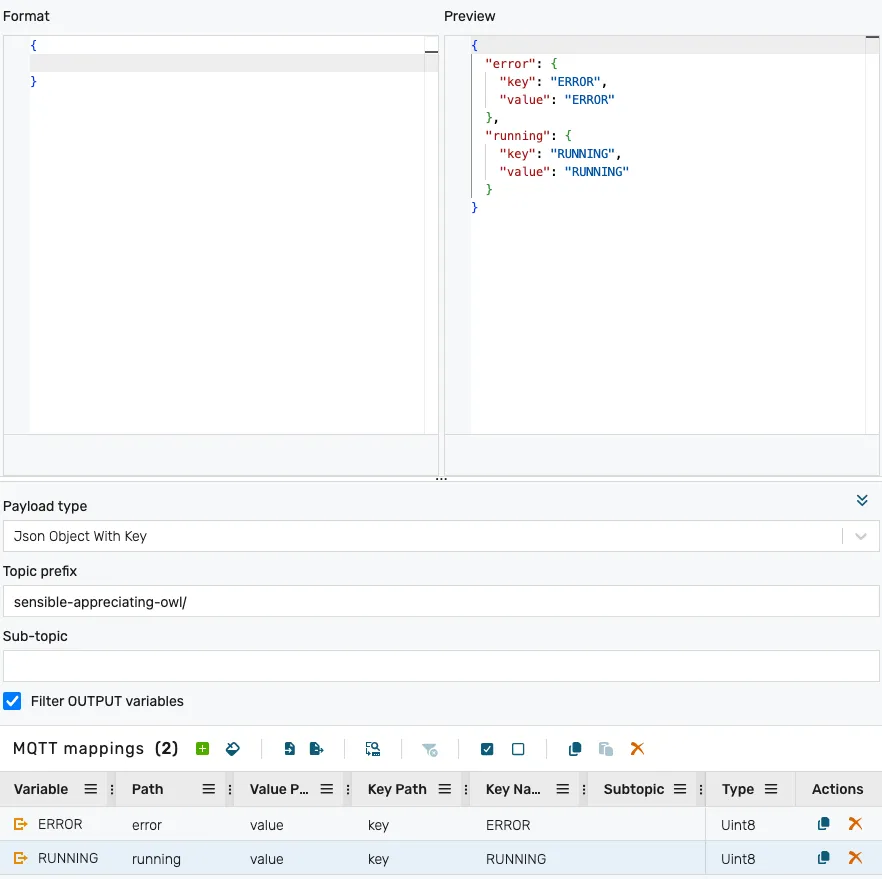
In this example, the Format is an object containing sub objects for each variable (ex. error) with two properties: key and value. The final JSON output will be:
{ "error": { "key": "ERROR", "value": "ERROR" }, "running": { "key": "RUNNING", "value": "RUNNING" }}** Example 2 - entries are provided in a data array, without fixed ordering. Each array item contains an object with two properties: key and value**
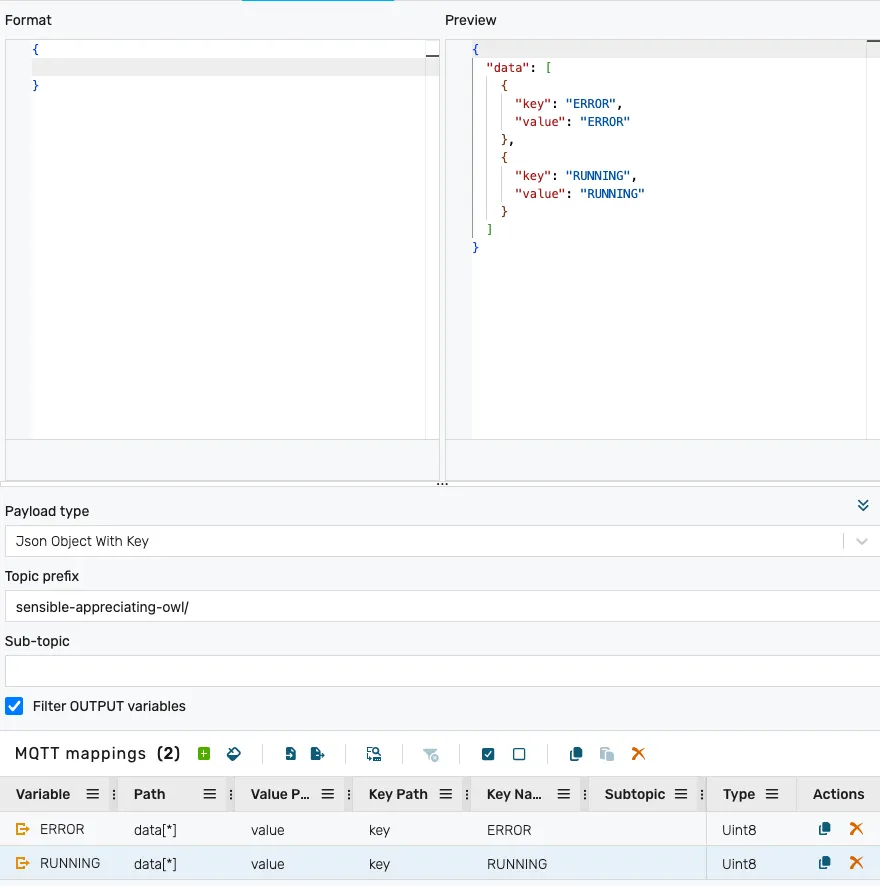
In this example, the Format of the payload is an object. The mappings will generate an unordered array, containing objects for each variable with two properties: key and value. The final JSON output will be:
{ "data": [ { "key": "ERROR", "value": "ERROR" }, { "key": "RUNNING", "value": "RUNNING" } ]}** Example 3 - entries are provided in an array payload, with fixed ordering. Each array item contains an object with two properties: key and value**
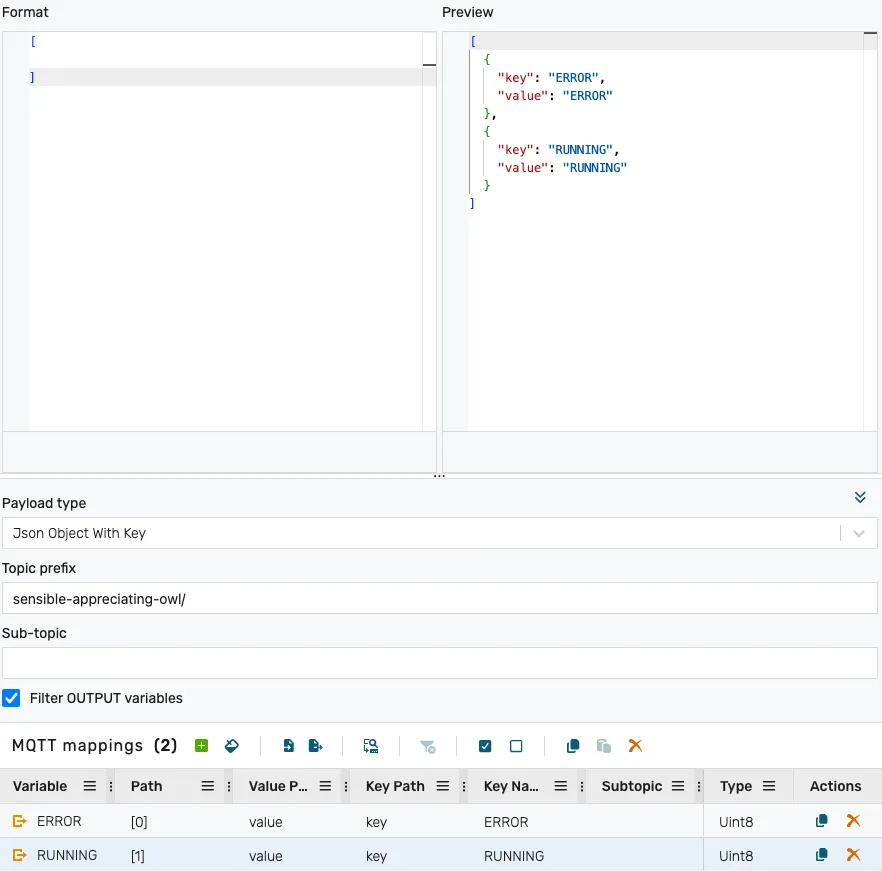
In this example, the Format of the payload is an array. The mappings will generate an entry for each variable with a fixed position in the array (the ERROR entry is always at position 0, and the RUNNING entry is always at position 1). The final JSON output will be:
[ { "key": "ERROR", "value": "ERROR" }, { "key": "RUNNING", "value": "RUNNING" }]Raw, Plain text
Section titled “Raw, Plain text”The mapping values are sent individually, serialized as plain text values (no JSON encoding).
Raw Binary
Section titled “Raw Binary”The mapping values are sent in binary form.
Data-type / payload-type rule
Section titled “Data-type / payload-type rule”In addition to the subtopic rules above, one rule constrains the combination of a mapping’s data type and the payload type of the producer/consumer it belongs to. It is enforced by both the producer validator and the consumer validator (and on the portal as you edit a mapping):
| Rule | Meaning |
|---|---|
object-type-requires-json-payload | A mapping whose data type is object is only allowed when the payload type is JSON Value, JSON Dictionary, or JSON object with key. Combining object with Raw, Plain text or Raw Binary is rejected. |
This rule behaves the same way as the subtopic rules with regard to saving: a new or edited mapping that violates it is rejected, while an unchanged pre-existing mapping that violates it produces a warning (logged, but the save still succeeds).
For example, the following consumer mapping is valid because the payload type is a JSON mode:
{ "payloadType": "jsonObjectWithKey", "mappings": [ { "variable": "machineState", "type": "object", "path": "state", "valuePath": "value" } ]}The same mapping with "payloadType": "rawBinary" (or "rawPlainText") is rejected with
the object-type-requires-json-payload code.
Trigger type
Section titled “Trigger type”Basic payloads JSON value, Raw, Plain Text, Raw Binary are always sent one by one (one payload per mapping).
For complex payloads such as JSON Dictionary or JSON Object With Key, different trigger behaviors can be specified:
On change
Section titled “On change”The on change trigger will send out a payload whenever a mapping value changes. For each mapping a payload will be generated, but the payload will match the configured format. This behavior is similar to the basic formats, with the difference that the payload is formatted.
Group changes
Section titled “Group changes”This trigger will group multiple variable changes into a single payload. The Trigger interval specifies the time in milliseconds in which the values are grouped to form a single payload.
This will send multiple values in a single payload, but only the changed ones. This means that mappings that haven’t changed in this interval will not be included in the payload.
Group all
Section titled “Group all”This trigger will group all variables into a payload. The payload will collect all changes during the Trigger interval and create a complete payload.
When using this trigger, all mappings will end up in the final payload, even if they didn’t change their value during the Trigger interval.